Ads

Wednesday, 20 April 2016

Webmin is an open source, web based system administration tool for Unix/Linux. Using Webmin, you can setup and configure all services such as DNS, DHCP, Apache, NFS, and Samba etc via any modern web browsers. So, you don’t have to remember all commands or edit any configuration files manually.

Install Webmin On Ubuntu

Add the webmin official repository:

Edit file /etc/apt/sources.list

sudo vi /etc/apt/sources.list

Add the following lines:

deb http://download.webmin.com/download/repository sarge contrib
deb http://webmin.mirror.somersettechsolutions.co.uk/repository sarge contrib

Add the GPG key:

sudo wget http://www.webmin.com/jcameron-key.asc
sudo apt-key add jcameron-key.asc

Update the sources list:
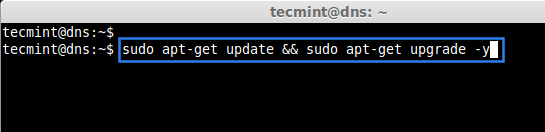
sudo apt-get update

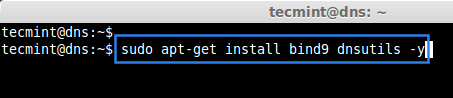
Install webmin using the following command:

sudo apt-get install webmin

Allow the webmin default port “10000” via firewall, if you want to access the webmin console from a remote system.

sudo ufw allow 10000

Access Webmin console

Open up your browser and navigate to the URL https://ip-address:10000/. The following screen should appear. Enter the user name and password to log in to webmin console.


Read More

0 comments:

Sunday, 10 April 2016

About DNS

DNS, stands for Domain Name System, translates hostnames or URLs into IP addresses. For example, if we typewww.uskysolution.com in browser, the DNS server translates the domain name into its associated ip address. Since the IP addresses are hard to remember all time, DNS servers are used to translate the hostnames like www.uskysolution.com to 173.xxx.xx.xxx. So it makes easy to remember the domain names instead of its IP address.
In this tutorial, we will see how to setup and configure DNS server on Ubuntu 15.10 server. Also, the same method will work on Debian and its derivatives.

Setup DNS Server In Ubuntu 15.10

Scenario

For the purpose of this tutorial, I will be using three systems. One will be acting as Master DNS server, the second system will be acting as Secondary DNS, and the third will be ourDNS client. Here are my three systems details.

Primary (Master) DNS Server Details:

Operating System     : Ubuntu 15.10 64bit minimal server
Hostname             : masterdns.uskywifi.local
IP Address           : 192.168.1.101/24

Secondary (Slave) DNS Server Details:

Operating System     : Ubuntu 15.10 64bit minimal server
Hostname             : secondarydns.uskywifi.local
IP Address           : 192.168.1.102/24

Client Details:

Operating System     : Ubuntu 14.04 desktop
Hostname             : client.uskywifi.local
IP Address           : 192.168.1.103/24

Setup Caching Server

In this configuration, BIND9 will find the answer to name queries and remember the answer for the next query. This can be useful for a slow internet connection. By caching DNS queries, you will reduce bandwidth and (more importantly) latency.
The default configuration is setup to act as a caching server. All that is required is simply adding the IP Addresses of your ISP’s DNS servers. Caching server is opt for low Internet connection.
Install bind9 packages using command:
sudo apt-get install bind9 bind9utils bind9-doc
Then edit /etc/bind/named.conf.options file,
sudo vi /etc/bind/named.conf.options
Simply uncomment and edit the following in /etc/bind/named.conf.options:
forwarders {
8.8.8.8;
};
Restart bind9 service.
sudo systemctl restart bind9

Test Caching Server

Run the following command to test it.
dig -x 127.0.0.1
Sample output:
; <<>> DiG 9.9.5-11ubuntu1-Ubuntu <<>> -x 127.0.0.1
;; global options: +cmd
;; Got answer:
;; ->>HEADER<<- opcode: QUERY, status: NOERROR, id: 60612
;; flags: qr aa rd ra; QUERY: 1, ANSWER: 1, AUTHORITY: 1, ADDITIONAL: 3
;; OPT PSEUDOSECTION:
; EDNS: version: 0, flags:; udp: 4096
;; QUESTION SECTION:
;1.0.0.127.in-addr.arpa.        IN    PTR
;; ANSWER SECTION:
1.0.0.127.in-addr.arpa.    604800    IN    PTR    localhost.
;; AUTHORITY SECTION:
127.in-addr.arpa.    604800    IN    NS    localhost.
;; ADDITIONAL SECTION:
localhost.        604800    IN    A    127.0.0.1
localhost.        604800    IN    AAAA    ::1
;; Query time: 4 msec
;; SERVER: 192.168.1.101#53(192.168.1.101)
;; WHEN: Mon Nov 23 17:48:36 IST 2015
;; MSG SIZE  rcvd: 132

Setup Primary (Master) DNS Server

You can use the same server for both Primary and Caching server.
Install bind9 packages on your server if not installed.
sudo apt-get install bind9 bind9utils bind9-doc

1. Configure Master DNS Server

DNS configuration files are stored in /etc/bind directory. Primary configuration file is/etc/bind/namd.conf.
Edit ‘/etc/bind/named.conf’ file.
sudo vi /etc/bind/named.conf
Make sure it contains the following lines. If not, add them.
include "/etc/bind/named.conf.options";
include "/etc/bind/named.conf.local";
include "/etc/bind/named.conf.default-zones";
Save and close the file.
Then, edit named.conf.local,
sudo vi /etc/bind/named.conf.local
Add the following lines:
zone "uskywifi.local" {
        type master;
        file "/etc/bind/forward.uskywifi";
        allow-transfer { 192.168.1.102; };
        also-notify { 192.168.1.102; };
 };
zone "1.168.192.in-addr.arpa" {
        type master;
        file "/etc/bind/reverse.uskywifi";
        allow-transfer { 192.168.1.102; };
        also-notify { 192.168.1.102; };
 };
Here,
  • forward.uskywifi – Forward zone file
  • reverse.uskywifi – Reverse zone file
  • 192.168.1.102 – Slave DNS server IP address

2. Create Zone files

Create forward and reverse zone files which we defiend in the‘/etc/bind/named.conf.local’ file.

2.1 Create Forward Zone

Create Forward Zone file name forward.uskywifi in /etc/bind/zones,
sudo vi /etc/bind/forward.uskywifi
Add the following lines:
$TTL 86400
@   IN  SOA     masterdns.uskywifi.local. root.uskywifi.local. (
        2011071001  ;Serial
        3600        ;Refresh
        1800        ;Retry
        604800      ;Expire
        86400       ;Minimum TTL
)
@       IN  NS          masterdns.uskywifi.local.
@       IN  NS          secondarydns.uskywifi.local.
@       IN  A           192.168.1.101
@       IN  A           192.168.1.102
@       IN  A           192.168.1.103
masterdns       IN  A   192.168.1.101
secondarydns    IN  A   192.168.1.102
client          IN  A   192.168.1.103

2.2 Create Reverse Zone

Create Forward Zone file name reverse.uskywifi in /etc/bind/zones,
sudo vi /etc/bind/reverse.uskywifi
Add the following lines:
$TTL 86400
@   IN  SOA     masterdns.uskywifi.local. root.uskywifi.local. (
        2011071002  ;Serial
        3600        ;Refresh
        1800        ;Retry
        604800      ;Expire
        86400       ;Minimum TTL
)
@       IN  NS          masterdns.uskywifi.local.
@       IN  NS          secondarydns.uskywifi.local.
@       IN  PTR         uskywifi.local.
masterdns       IN  A   192.168.1.101
secondarydns    IN  A   192.168.1.102
client          IN  A   192.168.1.103
101     IN  PTR         masterdns.uskywifi.local.
102     IN  PTR         secondarydns.uskywifi.local.
103     IN  PTR         client.uskywifi.local.

3. Configuring Permissions, Ownership for Bind

Run the following commands one by one:
sudo chmod -R 755 /etc/bind
sudo chown -R bind:bind /etc/bind

4. Test DNS configuration and zone files for any syntax errors

Check DNS default configuration file:
sudo named-checkconf /etc/bind/named.conf
sudo named-checkconf /etc/bind/named.conf.local
If it returns nothing, your configuration is valid.
Check Forward zone:
sudo named-checkzone uskywifi.local /etc/bind/forward.uskywifi
Sample output:
zone uskywifi.local/IN: loaded serial 2011071001
OK
Check reverse zone:
sudo named-checkzone uskywifi.local /etc/bind/reverse.uskywifi 
Sample Output:
zone uskywifi.local/IN: loaded serial 2011071002
OK
Restart bind9 service.
sudo systemctl restart bind9
Add the DNS Server details in your network interface config file.
sudo vi /etc/network/interfaces
Add the nameserver IP address:
auto enp0s3
iface enp0s3 inet static
        address 192.168.1.101
        netmask 255.255.255.0
        network 192.168.1.0
        broadcast 192.168.1.255
        gateway 192.168.1.1
        dns-nameservers 192.168.1.101
        dns-search uskywifi.local
Reboot your system.

5. Test DNS Server

Method 1:
dig masterdns.uskywifi.local
Sample Output:
; <<>> DiG 9.9.5-11ubuntu1-Ubuntu <<>> masterdns.uskywifi.local
;; global options: +cmd
;; Got answer:
;; ->>HEADER<<- opcode: QUERY, status: NOERROR, id: 27712
;; flags: qr aa rd ra; QUERY: 1, ANSWER: 1, AUTHORITY: 2, ADDITIONAL: 2
;; OPT PSEUDOSECTION:
; EDNS: version: 0, flags:; udp: 4096
;; QUESTION SECTION:
;masterdns.uskywifi.local.    IN    A
;; ANSWER SECTION:
masterdns.uskywifi.local. 86400    IN    A    192.168.1.101
;; AUTHORITY SECTION:
uskywifi.local.        86400    IN    NS    masterdns.uskywifi.local.
uskywifi.local.        86400    IN    NS    secondarydns.uskywifi.local.
;; ADDITIONAL SECTION:
secondarydns.uskywifi.local. 86400 IN    A    192.168.1.102
;; Query time: 4 msec
;; SERVER: 192.168.1.101#53(192.168.1.101)
;; WHEN: Mon Nov 23 17:55:00 IST 2015
;; MSG SIZE  rcvd: 125
Method 2:
nslookup uskywifi.local
Sample Output:
Server:        192.168.1.101
Address:    192.168.1.101#53
Name:    uskywifi.local
Address: 192.168.1.101
Name:    uskywifi.local
Address: 192.168.1.102
Name:    uskywifi.local
Address: 192.168.1.103
Now the Primary DNS server is ready to use.
It is time to configure our Secondary DNS server.

Setup Secondary(Slave) DNS Server

Secondary DNS server is optional, but recommended. If the master DNS server goes down, the Secondary DNS server will take charge and answer the queries. You need an additional server to setup Slave DNS server.
Install bind9 packages using the following command:
sudo apt-get install bind9 bind9utils bind9-doc

1. Configure Slave DNS Server

Edit ‘/etc/bind/named.conf’ file.
sudo vi /etc/bind/named.conf
Make sure it contains the following lines. If not, add them.
include "/etc/bind/named.conf.options";
include "/etc/bind/named.conf.local";
include "/etc/bind/named.conf.default-zones";
Save and close the file.
Then, edit named.conf.local,
sudo vi /etc/bind/named.conf.local
Add the lines as shown in bold:
zone "uskywifi.local" {
        type slave;
        file "/var/cache/bind/forward.uskywifi";
        masters { 192.168.5.101; };
 };
zone "1.168.192.in-addr.arpa" {
        type slave;
        file "/var/cache/bind/reverse.uskywifi";
        masters { 192.168.5.101; };
 };
Here,
  • forward.uskywifi – Forward zone file
  • reverse.uskywifi – Reverse zone file
  • 192.168.1.101 – Master DNS server IP address
The zone file must be in /var/cache/bind/ because, by default, AppArmor only allows write access inside it.

3. Configuring Permissions, Ownership for Bind

Run the following commands one by one:
sudo chmod -R 755 /etc/bind
sudo chown -R bind:bind /etc/bind
Restart bind9 service.
sudo service bind9 restart

4. Add the DNS Server details

Add the DNS Server details in your network interface config file.
sudo vi /etc/network/interfaces
# This file describes the network interfaces available on your system
# and how to activate them. For more information, see interfaces(5).
# The loopback network interface
auto lo
iface lo inet loopback
# The primary network interface
auto enp0s3
iface enp0s3 inet static
address 192.168.1.102
netmask 255.255.255.0
network 192.168.1.0
broadcast 192.168.1.255
gateway 192.168.1.1
dns-nameservers 192.168.1.101
dns-nameservers 192.168.1.102
dns-search home
Save and close the file.
Reboot your system.

5. Test DNS Server

After logging in to your server, run the following commands to check if DNS server is really working or not.
Method 1:
dig masterdns.uskywifi.local
Sample Output:
; <<>> DiG 9.9.5-3-Ubuntu <<>> masterdns.uskywifi.local
;; global options: +cmd
;; Got answer:
;; ->>HEADER<<- opcode: QUERY, status: NOERROR, id: 20290
;; flags: qr aa rd ra; QUERY: 1, ANSWER: 1, AUTHORITY: 2, ADDITIONAL: 2
;; OPT PSEUDOSECTION:
; EDNS: version: 0, flags:; udp: 4096
;; QUESTION SECTION:
;masterdns.uskywifi.local.    IN    A
;; ANSWER SECTION:
masterdns.uskywifi.local. 86400    IN    A    192.168.1.101
;; AUTHORITY SECTION:
uskywifi.local.        86400    IN    NS    masterdns.uskywifi.local.
uskywifi.local.        86400    IN    NS    secondarydns.uskywifi.local.
;; ADDITIONAL SECTION:
secondarydns.uskywifi.local. 86400 IN    A    192.168.1.102
;; Query time: 5 msec
;; SERVER: 192.168.1.101#53(192.168.1.101)
;; WHEN: Mon Nov 23 18:02:38 IST 2015
;; MSG SIZE  rcvd: 125
Method 2:
dig secondarydns.uskywifi.local
Sample Output:
; <<>> DiG 9.9.5-3-Ubuntu <<>> secondarydns.uskywifi.local
;; global options: +cmd
;; Got answer:
;; ->>HEADER<<- opcode: QUERY, status: NOERROR, id: 53461
;; flags: qr aa rd ra; QUERY: 1, ANSWER: 1, AUTHORITY: 2, ADDITIONAL: 2
;; OPT PSEUDOSECTION:
; EDNS: version: 0, flags:; udp: 4096
;; QUESTION SECTION:
;secondarydns.uskywifi.local. IN A
;; ANSWER SECTION:
secondarydns.uskywifi.local. 86400 IN A 192.168.1.102
;; AUTHORITY SECTION:
uskywifi.local. 86400 IN NS masterdns.uskywifi.local.
uskywifi.local. 86400 IN NS secondarydns.uskywifi.local.
;; ADDITIONAL SECTION:
masterdns.uskywifi.local. 86400 IN A 192.168.1.101
;; Query time: 5 msec
;; SERVER: 192.168.1.101#53(192.168.1.101)
;; WHEN: Mon Nov 23 18:10:02 IST 2015
;; MSG SIZE rcvd: 125
Method 3:
nslookup unixmen.local
Sample Output:
Server:        192.168.1.101
Address:    192.168.1.101#53
Name:    uskywifi.local
Address: 192.168.1.101
Name:    uskywifi.local
Address: 192.168.1.103
Name:    uskywifi.local
Address: 192.168.1.102
Note: A zone is only transferred if the Serial Number on the Primary DNS server is larger than the one on the Secondary DNS server.

Client Side Configuration

Add the DNS server details in ‘/etc/resolv.conf’ file in all client systems
vi /etc/resolv.conf
# Generated by NetworkManager
search uskywifi.local
nameserver 192.168.1.101
nameserver 192.168.1.102
Restart network service or reboot the system.

Test DNS Server

Now, you can test the DNS server using any one of the following commands:
dig masterdns.uskywifi.local
dig secondarydns.uskywifi.local
dig client.uskywifi.local
nslookup uskywifi.local


Read More

0 comments:


Domain Name Service (DNS) is a Naming service that maps IP addresses and fully qualified domain names to one another. Computers that runs DNS are called name servers.
Here I have installed and configured cache server using forwarder, forward look-up and reserve look-up. In most of the place, we need a reserve lookups. Caching server will not hold any domain names, it will only work as a Pointing server. Before going in depth we need to know about DNS server and how it works.

What is DNS?

Here is an easy way to understand the DNS and how it works.
If we need to access tecmint.com in browser, the system will look for tecmint.com. Here at the end of the .comthere will be a (.) so what is this ?.
The (.) represent the namespace Root server, there are total 13 root servers globally available. While we accessing tecmint.com it will ask to name server as per operating system configuration. In Ubuntu, we used to configure the name-server in /etc/resolv.conf, while accessing tecmint.com my browser will ask to root name-servers, if the root name-server don’t have my requested domain information it will cache my requested information and forward my request to (TLDTop Level Domain name-server, even in TLD name-server my request is not available it will be cached and forwarded to Authoritative name-server.
While the domain registration, our domain registerer will define which authoritative name-server should our domain use. So, authoritative name servers have our domain information’s, while our request reach ANS it will reply for the query that tecmint.com have 111.111.222.1 at the same time it will be cached in Authoritative name-server and send the request back to browser. Every above steps are done within milliseconds.
Hope you got what is DNS now, and how it works. Now let us set up a Caching DNS Server in Ubuntu Server 14.04 LTS.

Step 1: Installing DNS Server

First, take a look at the my local DNS server information such as static IP address and hostname, which is used to for this article purpose.
IP Address:	192.168.0.100
Hostname:	dns.tecmintlocal.com
To verify that the above settings are correct, we can use ‘hostnamectl‘ and ‘ifconfig‘ commands.
$ hostnamectl
$ ifconfig eth0 | grep inet
Verify System Hostname
Next, we update the default repositories and do a system upgrade, before setting-up DNS cache server.
$ sudo apt-get update && sudo apt-get upgrade -y
Upgrade Ubuntu
Upgrade Ubuntu
Now, install the DNS Packages bind and dnsutils using the following command.
$ sudo apt-get install bind9 dnsutils -y
Install DNS Serve in Ubuntu
Install DNS Serve
Once, dns installed, move to the bind configuration directory, under /etc/bind.
$ /etc/bind/
$ ls -l
Bind Configuration in Ubuntu
Bind Configuration

Step 2: Setting DNS Cache Server

First of all, we setup and configure caching server here. Open and edit the file named.conf.options using vim editor.
$ sudo vim named.conf.options
Now, here the word ‘forwarders‘ is used to cache domain name requests. So, here we are going to use my router as the forwarder. Uncomment the // in-front of the line’s as shown in the picture.
forwarders {
        192.168.0.1;
        };
Named Configuration
Named Configuration
Save and exit the file using wq!. Now its time to start the bind server for a small testing.
$ sudo /etc/init.d/bind9 start
Start DNS Server in Ubuntu
Start DNS Server
If we need to test whether caching works, we can use dig command and check whether the cache working or not.
For example purpose, we going to dig ubuntu.com now, at first, it will won’t be cache, so it may may take some milliseconds, once it cached it will be in lightning speed.
$ dig @127.0.0.1 ubuntu.com
A dig command is a tool for DNS look-ups. To know more about Dig command read the below topic.
  1. 10 Useful Dig Command Examples
Query DNS Lookups
Query DNS Lookups
Here, we can see in the above image at first dig it took 1965 milliseconds for my query and shows which ipaddress is binded to ubuntu.com.
Let us try for one more dig and see the Query time.
DNS Query Time
DNS Query Time
Cool!, In the second try we got the query within 5 milliseconds. Hope you know what is caching server now. The above image shows, that total 13 root servers are caching Ubuntu.com, because millions of peoples already accessed Ubuntu official site.

Step 3: Setting Master DNS Server

Create a MASTER DNS Server, Here I’m defining the domain name as tecmintlocal.com, edit the filenamed.conf.local using vim editor.
$ sudo vim /etc/bind/named.conf.local
Enter the DNS-Master entry as shown below.
zone "tecmintlocal.com" {
        type master;
        file "/etc/bind/db.tecmintlocal.com";
        };
    1. zone: Hosts details in Domain
.
  1. type: Master DNS.
  2. file: Location to store zone information.
Create Zone in DNS
Create Zone in DNS
Create the zone file db.tecmintlocal.com (Forward look-ups) from making a copy from db.local.
$ sudo cp db.local db.tecmintlocal.com
Now open and edit the copied zone file using vim editor.
$ sudo vim db.tecmintlocal.com
Copy Zone Files
Copy Zone Files
Next, add the following example entry, which I have used for tutorial purpose. I use the same for other virtual machine setups too. Modify the below entry as per your requirement.
;
; BIND data file for local loopback interface
;
$TTL    604800
@       IN      SOA     tecmintlocal.com. root.tecmintlocal.com. (
                     2014082801         ; Serial
                         604800         ; Refresh
                          86400         ; Retry
                        2419200         ; Expire
                         604800 )       ; Negative Cache TTL
;
@       IN      NS      ns.tecmintlocal.com.
ns      IN      A       192.168.0.100

clt1    IN      A       192.168.0.111
ldap    IN      A       192.168.0.200
ldapc   IN      A       192.168.0.211
mail    IN      CNAME   clt1.tecmintlocal.com.
Save and exit the file using wq!.
Create Forward DNS Zone
Finally, restart the bind DNS service using below command.
 
$ sudo service bind9 restart
Start DNS Service
Start DNS Service
We need to confirm, whether our above zone setup works. Let us check using dig command. Run the command as follows from localhost query.
$ dig @127.0.0.1 mail.tecmintlocal.com
Verify DNS Zone
Verify DNS Zone
Let’s ping and test the clt1.tecmintlocal.com, before that we need to change the dns-server entry to localhost in our dns server machine and restart the network to get effect.
Open and edit the Network interface settings and enter the DNS entry.
$ sudo vim /etc/network/interfaces
Change the DNS entry in the interface as below.
auto lo
iface lo inet loopback
auto eth0
iface eth0 inet static
        address 192.168.0.100
        netmask 255.255.255.0
        gateway 192.168.0.1
        network 192.168.0.0
        broadcast 192.168.0.255
        dns-nameservers 127.0.0.1
	    dns-search tecmintlocal.com
Add DNS Entry in Ubuntu
Add DNS Entry
After adding entry, restart the Network using following command.
$ sudo ifdown eth0 && sudo ifup eth0
If restarting network does not take effect, We must need a restart. Now Let’s ping and check theclt1.tecmintlocal.com, while its replying, we need to get the ip address what we defined for host-name clt1.
$ ping clt1.tecmintlocal.com -c 3
Ping Domain
Ping Domain

Setting Reverse DNS Lookups

Again open and edit the file named.conf.local.
$ sudo vim /etc/bind/named.conf.local
Now add the following reverse dns lookup entry as shown.
zone "0.168.192.in-addr.arpa" {
        type master;
        notify no;
        file "/etc/bind/db.tecmintlocal192";
        };
Create Reverse DNS
Create Reverse DNS
Save and exit the file using wq!. Now create a db.tecmintlocal192 file, as I have mentioned in the master file above for reverse look-up, copy the db.127 to db.tecmintlocal192 using following command.
$ sudo cp db.127 db.tecmintlocal192
Now, open and edit a file db.tecmintlocal192 for setup the reverse look-up.
$ sudo vim db.tecmintlocal192
Enter the following entry as below, modify the below entry as per your requirement.
;
; BIND reverse data file for local loopback interface
;
$TTL    604800
@       IN      SOA     ns.tecmintlocal.com. root.tecmintlocal.com. (
                        2014082802      ; Serial
                         604800         ; Refresh
                          86400         ; Retry
                        2419200         ; Expire
                         604800 )       ; Negative Cache TTL
;
@       IN      NS      ns.
100     IN      PTR     ns.tecmintlocal.com.

111     IN      PTR     ctl1.tecmintlocal.com.
200     IN      PTR     ldap.tecmintlocal.com.
211     IN      PTR     ldapc.tecmintlocal.com.
Reverse DNS Entry
Reverse DNS Entry
Restart the bind service using.
Now, verify the reserve look-up entry.
$ host 192.168.0.111
While we do a reverse look-up using an ip address as shown above, it want to reply with a name as above image shows.
Let’s do a check using dig command too.
$ dig clt1.tecmintlocal.com
Reverse DNS Lookup
Reverse DNS Lookup
Here, we can see the Answer for our Query in Answer Section as domain-name clt1.tecmintlocal.com has the ip address 192.168.0.111.

Step 4: Setting Client Machine

Just change the ip address and dns entry in client machine to Our local dns server 192.168.0.100, if so our client machine will get assigned host-name from local DNS-server.
Let us check the host-name of our client using following series of commands.
$ ifconfig eth0 | grep inet
$ hostname	
$ dig -x 192.168.0.100
Verify Local DNS
Verify Local DNS
Understanding zone file entry in dns, This image will give you a small explanation what we have defined in zone file entry.
Understanding DNS Zone Entry


Read More

0 comments:

Recent News